Square WebPay
This page discusses Square WebPay, the currently supported interface to Square.
There was an older Square module, based on the Square Payments Form library, which was built in to Zen Cart from 1.5.5 to 1.5.8. However, Square has deprecated this library, so the older module no longer works. The Square Payments Form documentation is maintained for historical purposes.
Square WebPay
- For PHP 7, the Square WebPay is an open source module available in the Plugins library as Square Web Payments API plugin.
- For PHP 8 and above, Square WebPay is a commercial extension which should be purchased from the developer.

- The top one (“Square”) is the old deprecated Square module.
- The bottom (“Square WebPay”) one is the new Square module.
Requirements
- You must be using SSL on your website
- You will need a Square account, already validated and connected with your bank. You may create a Square merchant account here.
Please note: do NOT remove the old Square files from your Zen Cart installation if you are running Zen Cart 1.5.7 or 1.5.8. (These have been removed from 2.0.0 and above.)
Installing Square Web Payments - first time
-
If you are a developer, ask your client to turn off 2FA on Square momentarily so you can login and do this work; they can turn it back on when you’re done.
-
Install the Square Web Payments module files. Then to go to Admin > Modules > Payments > Square WebPay, and click Install.
-
Double check - did you just install the module “Square WebPay”? If you’re on the module “Square,” it will look very similar but won’t work.
-
Login at https://connect.squareup.com/apps to view the apps you’ve connected to your account.
-
Click + to create a New Application for your Zen Cart store. Give it a name, such as “WebPay”. If it’s for a test installation of your site with a different URL, call it WebPay-Test or something like that.
-
There’s a permission confirm dialog you’ll have to accept.
-
Ensure you have selected the correct API version. See Square API Version.
- Version 3.0.x of Square Web Payments requires API Version 2025-01-23.
- Version 2.0.x of Square Web Payments requires API Version 2024-11-20.
- Version 1.2.0 of Square Web Payments requires API Version 2024-02-22.
- Version 1.0.1 of Square Web Payments requires API Version 2022-02-16.
Note that if it is the first time you are creating the app, you may have to wait until after you finish and then click “App details” on the left sidebar.
-
Click on the application icon that was just created (named “WebPay” or whatever name you used).
-
The environment will be Sandbox by default. Click “Production”.
-
Copy and Paste the Production Application ID into your Square WebPay configuration Application ID field in Zen Cart admin.
-
Click on the OAuth tab. In the “Redirect URL” field, enter
https://YOURSTORE.com/squareWebPay_handler.phpand click Save at the bottom. (Ensure the URL you enter points to the correct directory or subdirectory on your server.) -
Now click Show on the Production Application secret field. Copy and Paste the secret into your Square WebPay configuration Application Secret (OAuth) field in Zen Cart admin.
-
In your Zen Cart admin, do the following:
- Click Update to save the new Square WebPay config values.
- Click the green button in the Zen Cart admin sidebar that says “Click here to login and Authorize your account.” If everything is correct, the Sort Order LED for Square WebPay will go green.
- Click the Edit button one more time. This will fill in the Location ID field. Click Update.
-
If this isn’t working, check again to be sure you are editing the “Square WebPay” module not the old “Square” module - it’s easy to get the two mixed up.
Once you have installed and successfully tested Square Webpay, you will want to create a cron job to refresh the Square token.
Updating Square Web Payments
- Follow the guidance provided by the Square WebPay developer.
- You may need to update your Square app on https://connect.squareup.com/apps to change the API version. See Square API Version.
- If you are switching between a test and live website, you must remove and re-install the module in Zen Cart admin. See the remarks in the next section.
Installing Square Web Payments in a Test environment
If you import a live site database into a test environment, please be sure to delete and re-add the Square Web Payments app per the instructions above. You cannot just replace the Application ID and Secret, you must reinstall the app.
The error you will see if you try this without reinstalling will look something like this:
Your transaction failed due to an error: [INVALID_CARD_DATA] Card nonce not found in this application environment. Please ensure an application ID belonging to the same environment is used when generating the nonce.
Handling Refunds, Captures, Voids
Refunds
When viewing a transaction in your store Admin, if it was paid using Square within the last 120 days, you will be shown the option to Refund some or all of the payment. Simply enter the amount you wish to refund. Then check the box to confirm, and click Submit. You will see a status message confirming the refund has been issued.
NOTE: You SHOULD do all refunds via your store Admin. While you might be able to start a refund from your Square Dashboard, that will NOT automatically update your orders in Zen Cart to show the change in status. But if you do the refund from within your Zen Cart Admin, the refund will show in both places, as well as in the customer’s order-status-history, which is a more friendly experience for them.
Captures
If you’ve configured the module to “authorize only” instead of automatically capturing each “purchase”, then you will also see an option to Capture the previously-authorized transaction. CAPTURES MUST BE DONE WITHIN 6 DAYS, or they will be voided automatically, releasing the hold on those funds for the customer.
NOTE: Captures can ONLY be done via your store Admin. You will not see uncaptured (authorize-only) transactions in your Square Dashboard.
Voids
If you’ve configured the module to “authorize only”, then you will see a Void option. This can be used to cancel an Authorization and release the “hold” on those funds back to the customer.
NOTE: Voids can ONLY be done via your store Admin. You will not see authorize-only transactions in your Square Dashboard.
Reinstalling Square Web Payments
If your access token goes bad, you can get into a state where you have to delete and reinstall Square. Here’s what you need to do to configure the module once you have reinstalled it:
- Login at https://connect.squareup.com/apps to view the apps you’ve connected to your account.
- Click on the application icon that you created (probably named “WebPay” or whatever name you used).
- Copy and Paste the Production Application ID into your Square WebPay configuration Application ID field in Zen Cart admin.
- Click on the OAuth tab.
- Now click Show on the Production Application secret field. Copy and Paste the secret into your Square WebPay configuration Application Secret (OAuth) in Zen Cart admin.
- In your Zen Cart admin, do the following:
- Click Update to save the new Square WebPay config values.
- Click the green button in the Zen Cart admin sidebar that says “Click here to login and Authorize your account.” If everything is correct, the Sort Order LED for Square WebPay will go green.
- Click the Edit button one more time. This will fill in the Location ID field. Click Update.
Upgrading to Square Web Payments from Square Payments Form
- Go to Admin > Modules > Payment > Square, click Edit, and set Enable Square Module to false, then click Update.
- Login at https://connect.squareup.com/apps. Note that you will need to pick a new name from your existing Square app . Unfortunately you cannot rename apps.
- Use the Installation instructions above.
- Once you are certain Square Web Payments is working, Go to Admin > Modules > Payment > Square and click Remove.
Square Errors
If you get an error from Square (in particular, “The provided OAuth access token has expired”), see Square Error Messages.
Square Authorized Representative
If you’re a Zen Cart contractor (or your business has a contractor who manages your cart), adding an authorized representative to your Square account means you will no longer need to coordinate to handle 2FA prompts.
To add an authorized representative to Square, sign in to your Square Dashboard, go to Settings > Account & Settings > My Business > Security, and select Assign authorized representative to add a new or existing team member. Note that a specific email address can only be used for one representative account (if you are a developer with multiple clients, you will need to use email aliases or multiple email addresses).
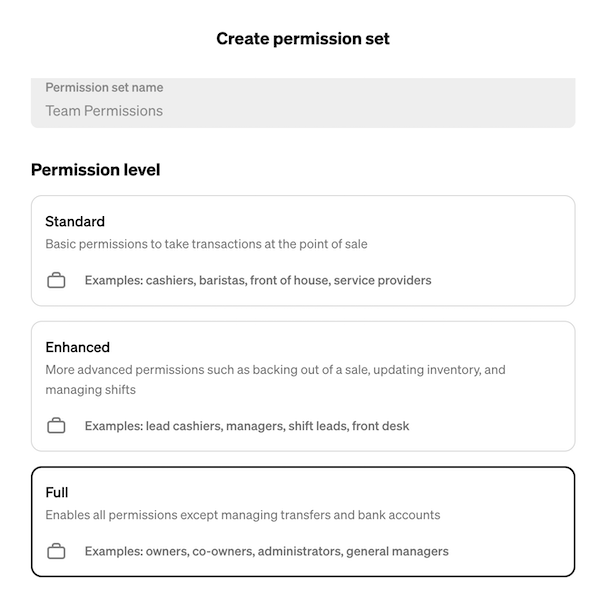
In order to allow your developer to change the API version - something that needs to be done each time you upgrade Square WebPay - you will need to give them Full permission level when you create their representative account.
You can change your developer’s permission on the Square Dashboard by clicking “Staff” on the left hand sidebar, then clicking the name of the developer in the Team members list, then clicking “Edit Permissions” on the right hand sidebar.
Apple Pay
Installation
- You must register your domain with Apple Pay for it to work. See: https://developer.squareup.com/docs/web-payments/apple-pay#production-configuration. Note that the subdomain
www, if used, must be specified when you register the domain. If you registermysite.com, but yourconfigure.phpfile hasHTTP_SERVERset tohttps://www.mysite.com, you’ll get a javascript error saying your domain is not registered. You should registerwww.mysite.comand be sure your.htaccessfile normalizes inbound URLs to includewww.
Customer Experience
- Apple Pay only works in the Safari browser.
- Apple Pay will only work with a card in your Apple Wallet. You may get prompted to use a card that’s stored in your browser or password manager, but if it’s not in your Apple Wallet, you’ll get an error back when you press “Confirm” on the checkout confirmation page.